In "
Easy, simple develop and deploy PHP, MySQL applications using the cloud. Manage the MySQL service." I showed to you how to get started with PHP/MySQL development/deployment in the most convenient, easy and simple way using only cloud technologies. All you need is only a web browser. In this tutorial I will show you how to use Source Control Management (SCM)/ Version Control System (VCS) such as Git to track your revisions and share the project in
GitHub or another Hosting service of choice.
There is also a
YouTube Tutorial on the same topic.
You don't need to carry around flash drives DVDs or a computer. You can use any computer/device in the world. All you need is Internet and web browser. Your development stack(s) and projects just follow you and they are stored safely somewhere in the cloud. :)
All you need is again only a web browser!
I have made a lot of screenshots. Don't let this scare you. :)
I just explain everything step by step. And I think more screenshots will actually help you.
So if you have already created an application in Codenvy you can push it to GitHub and I am going to explain how it is done. If you want to knwo how to create a PHP application in a very easy and convenient way please read my tutorial "
Easy, simple develop and deploy PHP, MySQL applications using the cloud. Manage the MySQL service."
1) Just open the project you want to push to
GitHub or another SCM hosting service. (e.g. bitbucket)
2) We have to generate RSA key pair in order to allow Codenvy and
GitHub to exchange data securely. In order to do so you have to go to Window->Preferences in Codenvy.
3) Hit "Generate Key"
4) Enter the domain name of the hosting service. In our case "
github.com"
5) The RSA key pair has been generated. You can see the public key by clicking on "view"
6) Copy the public key.
7) Go to your
GitHub account settings -> SSH keys and add the public key.
8) Paste the public key and give it a name.
9) You will be asked to enter your credential again.
10) The key has been stored in GitHub. So Codenvy holds the private key and Github has the public key now. These 2 services can communicate using a secure protocol.
11) It is time to create a repository for our project, which exsists so far only in Codenvy.
12) Give it a name.
13) You have to choose SSH. (Remember from step 10 we are using RSA key pair)
14) Initialize a repository in Codenvy.
15) Add all files and folders.
16) Add the address to your GitHub repository which will hold your project files.
17) Just make sure you use the right address of the repository. It should be SSH address.
18) Lets add all the files and folders we want to be under the control of the SCM (Git).
19) Lets commit. This is adding the files to the local database of Git
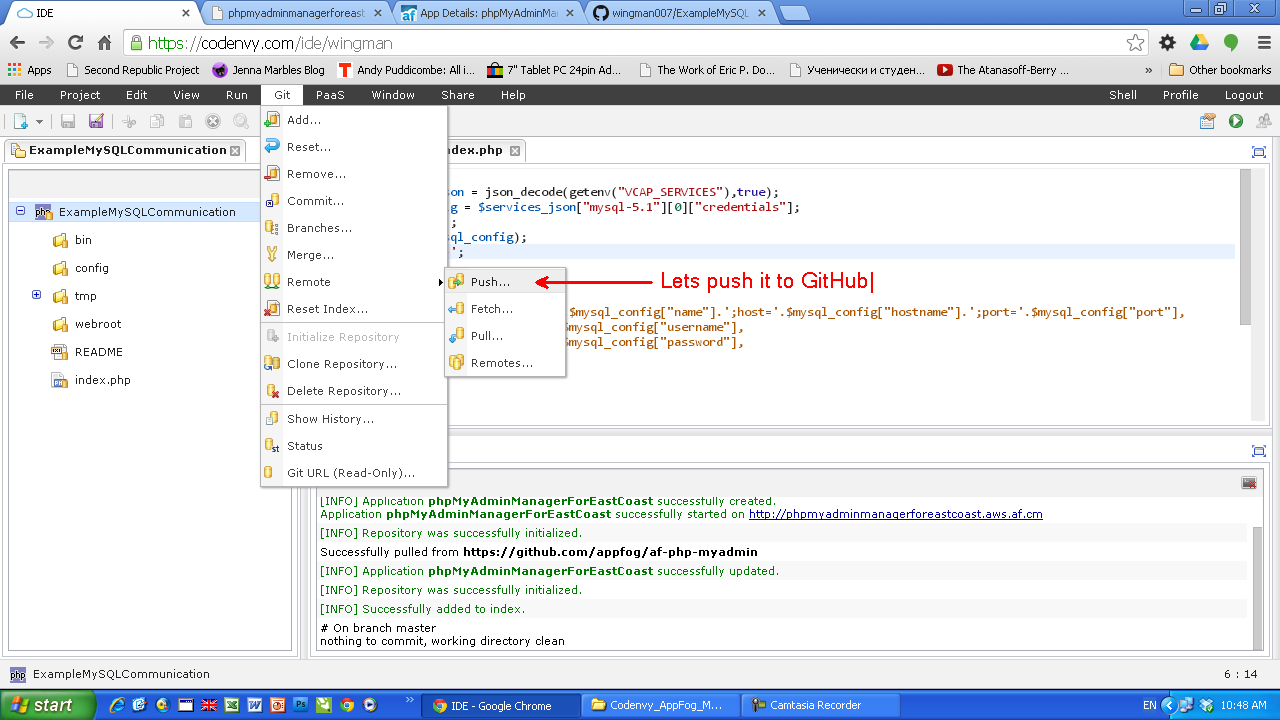
20) Lets push our local files to GitHub.
21) refresh to make sure all files have been uploaded to the remote (origin) repository.
I hope you find this tutorial useful. Just like, share and comment.
Have fun! :)


thank your post . very goood
ReplyDeleteI am glad you like it! Codenvy has changed a lot since this post was published. But the ideas are the same.
ReplyDeleteIt helped me. Thanks!
ReplyDeleteThanks alot :)
ReplyDeleteThis is what exactly I need. Thanks a lot.
ReplyDeleteCodenvy has changes but still this helped me to understand.
lol nigger
ReplyDelete