You want to start developing with PHP and MySQL, but you don't want to mess around with installation of Apache, MySQL server, dealing with hosting companies etc.?
There is a way. And this way leads to the clouds! :)
You can develop and deploy your application within 5-10 minutes.
This tutorial can be used by beginners and advanced users.
All you need is just a web browser! :)
I have created a
YouTube Tutorial as well. It describes the same steps and it is only 15 minutes long. So in 15 minutes or less you can have an application up and running without the troubles of installing a development stack.
The key is a cloud IDE called "Codenvy". It allows you to create your app within seconds and Deploy it to a lot of existing "Platform as a Service", In this tutorial I will show how to do so with "AppFog". You can use not only MySQL but mongoDb, Redis etc. And you can develop not only PHP applications, but Java, Ruby etc.
All these steps can be executed from almost every computer or device in the planet that can run a web browser. You are free to use different computers, operating systems, browsers. Your development stacks and projects are always with you. And you can deploy your applications with a click of a button. :)
We are going to use 2 applications. Don't worry they are created with a click of a button. One of them is our real application. Another is temporary used just to deploy phpMyAdmin to be able to manage our MySQL service on AppFog. You can delete it from the IDE (Codenvy) after the deployment is done if you wish. :)
I have made a lot of screenshots. But don't worry! They are here not to confuse you, by explaining difficult concepts, but to make it easier for you, showing every simple dummy step. Also you can run them as a slideshow and even don't have to read the text in the post.
1) Go to
https://codenvy.com/ . Login or register. They support OpenID so you can login with github or google account.
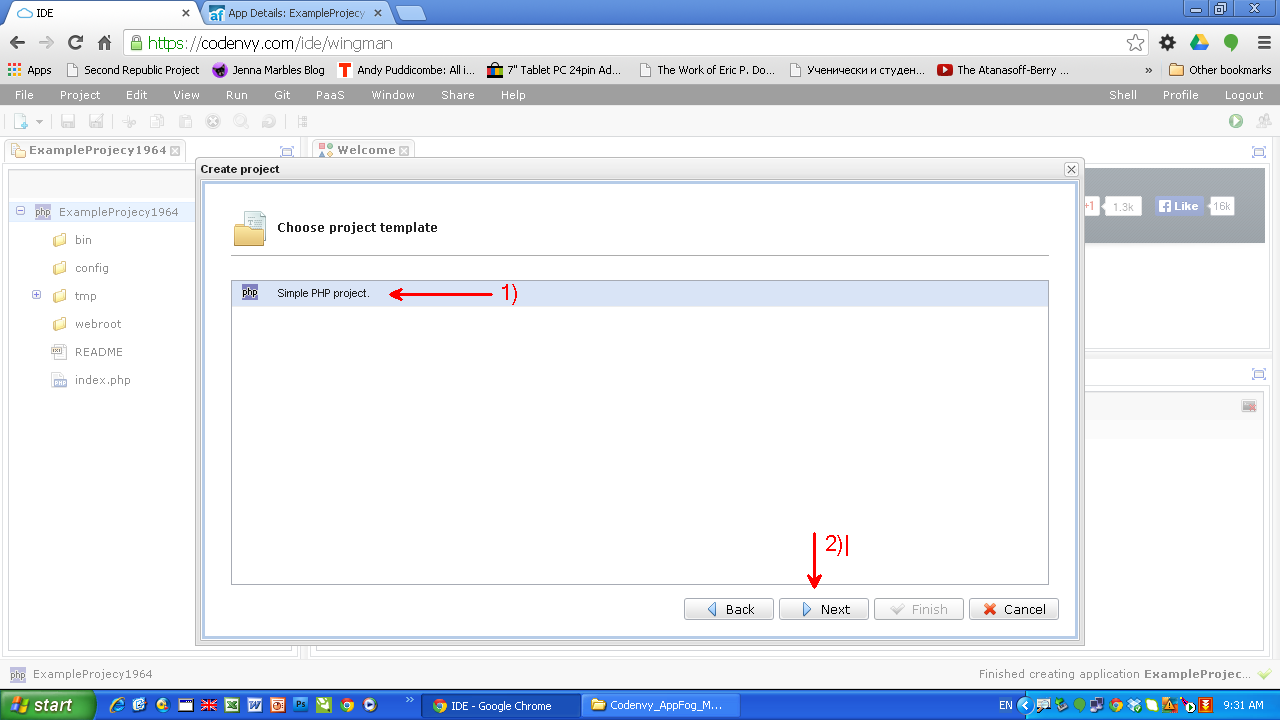
2)You can start from scratch or if you already have a project in Codenvy you can open it. In this tutorial I will assume you are starting from scratch and you want to use PHP and MySQL
3) Give a name to the project. Choose the technology. It is PHP in our case. Choose the deployment platform. I am going to use AppFog as a PaaS. It is very good one. You application will become available online for a seconds. And you can choose from many DB services: MySQL, MongoDB, Redis etc.
4) Login with your AppFog username.password or go to
https://www.appfog.com/, register and get an account.
5) Select the infrastructure. AppFog has 4 infrastructures at the moment (AWS Asia Southeast, AWS Europe West, AWS US East, HP Openstack AZ 2). Select the infrastructure according to your customers.
6) And you are Done! :). Your "Hello World!" PHP application is up and running. It is also available to your customers to access it. But don't you worry. Only the people who know the URL can access it.
7) You are in charge. You have full control over the instance of your application directly from Codenvy
8) It is time to run a DB service on the infrastructure if you need one. You can do it directly from the IDE (Codenvy) or go to appfog.com and do it from their interface.
9) Lets do it from the AppFog interface (dashboard). Login to AppFog.
10) Find your running application. As you can see you have a full control.
11) Select "Services", because we want to use a MySQL service in our PHP application.
12) We have the service up and running, ready to be used in our PHP app.
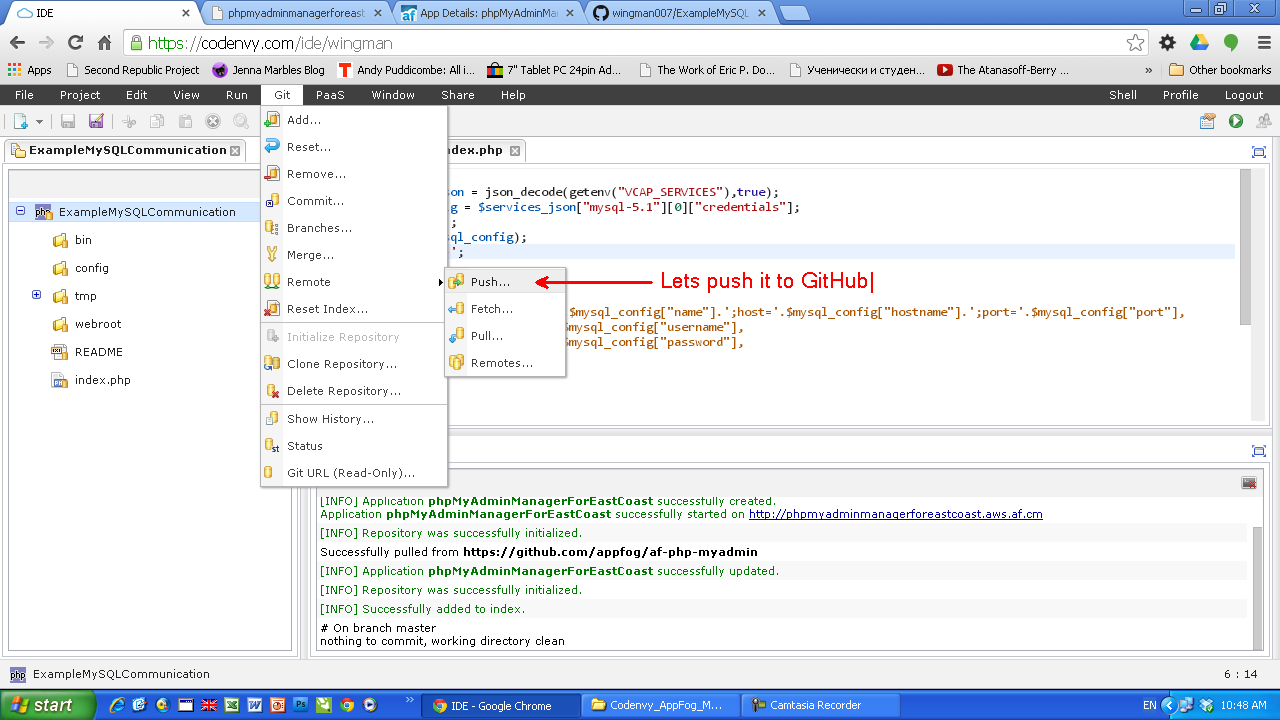
13) But we want to be ablle to mange the DB server (MySQL) add, delete tables etc. We can achieve this using tunneling. But this requires installing software etc. There is an easier way, by using phpMyAdmin. So lets deploy and run an instance of phpMyAdmin on the same Infrastructure and manage the MySQL service. In order to do so we are using again Codenvy. It is extremely easy to deploy apps from the cloud IDE.
Start by creating a new Project in Codenvy which we will use to Deploy phpMyAdmin to AppFog infrastructure.
14) phpMyAdmin is a PHP application. This is the reason we start again with creating a PHP project and choose to deplaoy to the same PaaS (AppFog) on the same infrastructure as our running MySQL service
15) Check if your second app is running on AppFog.
16) We don't need any of the files from a Codenvy "Hello World" PHP app, so lets delete them.
17) We are going to use GitHub to pull the right version of phpMyAdmin from
https://github.com/appfog. This is a modified version of phpMyAdmin. Notice we are not downloading the original version of phpMyAdmin.
18) Go to
https://github.com/appfog and find phpMyAdmin there
19) Copy the address of the repo.
20) Add the remote repository address. This is the address of phpMyAdmin
https://github.com/appfog/af-php-myadmin
21) Pull the phpMyAdmin from the repo.
22) Deploy the phpMyAdmin to AppFog
23) Try to see if it has been deployed. It is there, but we have to do configuration before we start using it.
24) Go to AppFog and find the project from our phpMyAdmin.
25) Bind the running MySQL service to our phpMyAdmin application. We are going to manage the service with this phpMyAdmin.
26) Set up the password for our phpMyAdmin instance. In order to do so, we have to set an Environment Variable for our phpMyAdmin app in AppFog. Go to Env variables tab and enter PMA_PASSWORD to whatever password you want to use to access your phpMyAdmin.
27) After having completed the previous steps you can refresh the page with your phpMyAdmin instance to enter your username/password
28) As a username use your AppFog username (it is an email address) and as a password use the password you have set in the Environment Variable PMA_PASSWORD. You can change the username as well. All you have to do is set another variable PMA_USERNAME with the desired value and in this case when you login to your phpMyAdmin instance instead of using your AppFog username you can use the username you have set up with the variable PMA_USERNAME
29) Congratulations! You have setup your instance of phpMyAdmin. You can create, drop tables etc. You are in charge.
30) You can go back to your original application now in Codenvy. You can delete from your IDE (Codenvy) the extra application we have created for phpMyAdmin. Or you can keep it there. :)
31) There is one more thing. How to connect from our app to the MySQL server? All the connection information is in an Environment Variable called VCAP_SERVICES. It is a JSON object. So you can convert it to an PHP array and get the username, password, database name etc. for your MySQL instance. You can find an example code on how to parse and use the values in
pastebin.com
32) You are in charge of your running application on AppFog and the services. You can Stop, Start, Remove etc. the instance of your application or you can manage the services directly from Codenvy if you like.
33) In order to remove the service you can go to AppFog and do it from their interface.
I hope you enjoyed the tutorial! If you find it useful share, comment and like.
Have fun! :)